

Last updated: August 2026
Wild Trail Hiker is reader-supported. We may earn a commission when you buy through links on this page, at no extra cost to you. We only recommend products we’d consider taking on a multi-day trip ourselves.
Before You Go
Parks Canada’s own hiker guide opens with a line worth repeating: “This hike is not for everyone.” The West Coast Trail is a remote Type 3 route with more than 100 ladder systems, cable car river crossings, deep mud, and stretches with no formal trail tread at all. Reservations are mandatory and capped by daily quota, the trail is only open May 1 through September 30, and you must clear a Parks Canada safety orientation before you’re allowed to start. Do not book this as a first backpacking trip.
Why This Trail
The West Coast Trail exists because of shipwrecks. This stretch of Vancouver Island coastline, facing the open Pacific and the Juan de Fuca Strait, earned the name “the Graveyard of the Pacific” as the toll of wrecked ships and drowned sailors climbed through the late 1800s. After the steamship Valencia went down in 1906 with the loss of more than 125 lives, the Canadian government built the Pachena Point Lighthouse and strung a telegraph line through Huu-ay-aht, Ditidaht, and Pacheedaht territory to link lifesaving stations along the coast. That route, the Dominion Life Saving Trail, became a recreational hiking trail in 1973 when it was folded into the newly formed Pacific Rim National Park Reserve.
What makes it worth the planning headache today is the sheer physical variety packed into 75 kilometres: old-growth temperate rainforest, sandstone shelf and boulder beaches, surge channels and sea caves, and river crossings by cable car or by wading, all threaded together with ladders bolted straight up cliff faces. More than 7,500 backpackers a year take it on, and the ones who finish tend to describe it less as a scenic walk and more as a genuine physical and logistical challenge, one that rewards hikers who respect the tide chart and the terrain in equal measure.
Trail at a Glance
- Distance: 75 kilometres (47 miles), Parks Canada’s official figure between Gordon River and Pachena Bay. Unofficial estimates that account for the trail’s constant up-and-down and detours around obstacles put the real walking distance closer to 85 km.
- Duration: 6 to 8 days is Parks Canada’s stated range. A 7-day, 6-night pace is the most common choice among hikers, giving enough time buffer for the trail’s harder southern sections and any tide-window waits.
- Difficulty: Hard to expert. Parks Canada classifies it as a remote Type 3 trail: expect missing or rotten boardwalks, exposed nails, missing ladder rungs, and non-functioning cable cars as standard trail conditions, not exceptions.
- Best season: May 1 through September 30. This is not just a recommendation, it is the only window the trail is open and reservable; heavy autumn and winter rain, high tides, and short days close it the rest of the year.
- Permits: Required for every overnight hiker: a WCT Backcountry Use Permit plus a Pacific Rim National Park Reserve entry pass. Booked through Parks Canada’s reservation system, released in mid-January for the coming season and subject to a daily quota. Maximum group size is 10.
- Start trailhead (this guide’s direction): Gordon River, near Port Renfrew (south end): Gordon River Trailhead on Google Maps.
- End trailhead: Pachena Bay, near Bamfield (north end): Pachena Bay Trailhead on Google Maps.
The West Coast Trail is a point-to-point route hiked in either direction, and you commit to a direction when you book. This guide describes it Gordon River to Pachena Bay (south to north), the direction Parks Canada’s own safety guidance is written around: its explicit warning against hiking Gordon River to Camper Bay in a single day only makes sense if you’re starting at Gordon River. There is also a third entry point, Nitinaht Narrows, roughly at the trail’s midpoint, useful for hikers who want a shorter 3 to 5 day taste of the route rather than the full traverse.
Trail Map
View the West Coast Trail (South to North) on AllTrails: includes an elevation profile, current condition reports, and hiker photos.
Parks Canada’s official West Coast Trail planning page: the source of truth for reservations, fees, and safety requirements. The actual waterproof trail map itself is only issued in person at the WCT Orientation Centres when you register, it is not published as a downloadable file, so carry the physical copy on trail and don’t rely on a phone screenshot.
Getting There and Away
Getting there (Gordon River Trailhead, south end): Port Renfrew sits about 2 hours from Victoria via the fully paved Highway 14 through Sooke, with the Gordon River WCT Orientation Centre a further 5 km beyond the village. The West Coast Trail Express runs a direct bus from Victoria (about 2 hours); book ahead. Guarded pay parking is available in Port Renfrew for around $7 to $10 a day, worth using given the trailheads’ history of vehicle break-ins during the week you’re away. The nearest practical airport is Victoria International (YYJ).
Getting away (Pachena Bay Trailhead, north end): Pachena Bay sits 5 km south of Bamfield, reached only by gravel logging road: about 2 hours from Port Alberni or 3 hours from Duncan, both unsealed for the final stretch. The West Coast Trail Express also connects Bamfield to Victoria (about 5.5 hours) and Nanaimo (about 3.5 hours), and a local Bamfield Taxi shuttles between the village and the trailhead itself. Cell coverage is effectively absent at both Pachena Bay and Nitinaht Village, and limited even in Bamfield and Port Renfrew, so confirm any pickup arrangements before you lose signal.
The ferry problem: Two rivers on this route can only be crossed by ferry, and both run on limited daily hours: the Gordon River ferry (8:45 am to 3:30 pm) and the Nitinaht Narrows ferry (roughly 9:30 am to 5:00 pm), both operated by the Ditidaht and Pacheedaht First Nations. Miss the last Gordon River crossing on your final day and you’re stuck overnight on a small beach with no outhouse, food storage, or water source, so plan your last day’s distance around the ferry timetable, not the other way round.
Staging towns: Port Renfrew has basic groceries, fuel, and the Pacheedaht Campground right beside the Gordon River Orientation Centre. Bamfield, a small, remote fishing community, has similarly limited services and the Pachena Bay Campground near its trailhead. Neither town has banking services beyond a single ATM in Bamfield, so carry cash: Parks Canada itself recommends up to $100 per person for trail emergencies.
Day-by-Day Breakdown
This 7-day, 6-night breakdown follows the most commonly hiked pace, Gordon River to Pachena Bay. Distances and hiking times below are drawn from trip reports and the official Parks Canada preparation guide rather than a single authoritative mile marker table, since conditions (mud depth, detours around damaged structures, tide windows) shift the real walking time year to year. Treat the hours as ranges, not promises: on the trail’s toughest sections, 1 to 2 km/h is a normal pace, not a slow one.
Day 1: Gordon River to Thrasher Cove (about 6 km, 3 to 6 hours)
Highlight: The trail’s very first ladder, descending straight from the Gordon River trailhead.
A short day by distance and a deliberate one. Parks Canada explicitly advises against attempting Gordon River to Camper Bay in a single day, since most trail accidents in this stretch happen later in the day when hikers are tired and rushing, and recommends camping at Thrasher Cove instead. The forest here is old-growth and the terrain is rooty and uneven from the first kilometre, an early signal of what the southern half of the trail demands. Water at Thrasher Cove can run low by late summer; fill up earlier in the day if the creek looks thin.
Day 2: Thrasher Cove to Camper Bay (about 6.8 to 9 km, 4.5 to 8 hours)
Highlight: Owen Point’s sea caves and surge channels.
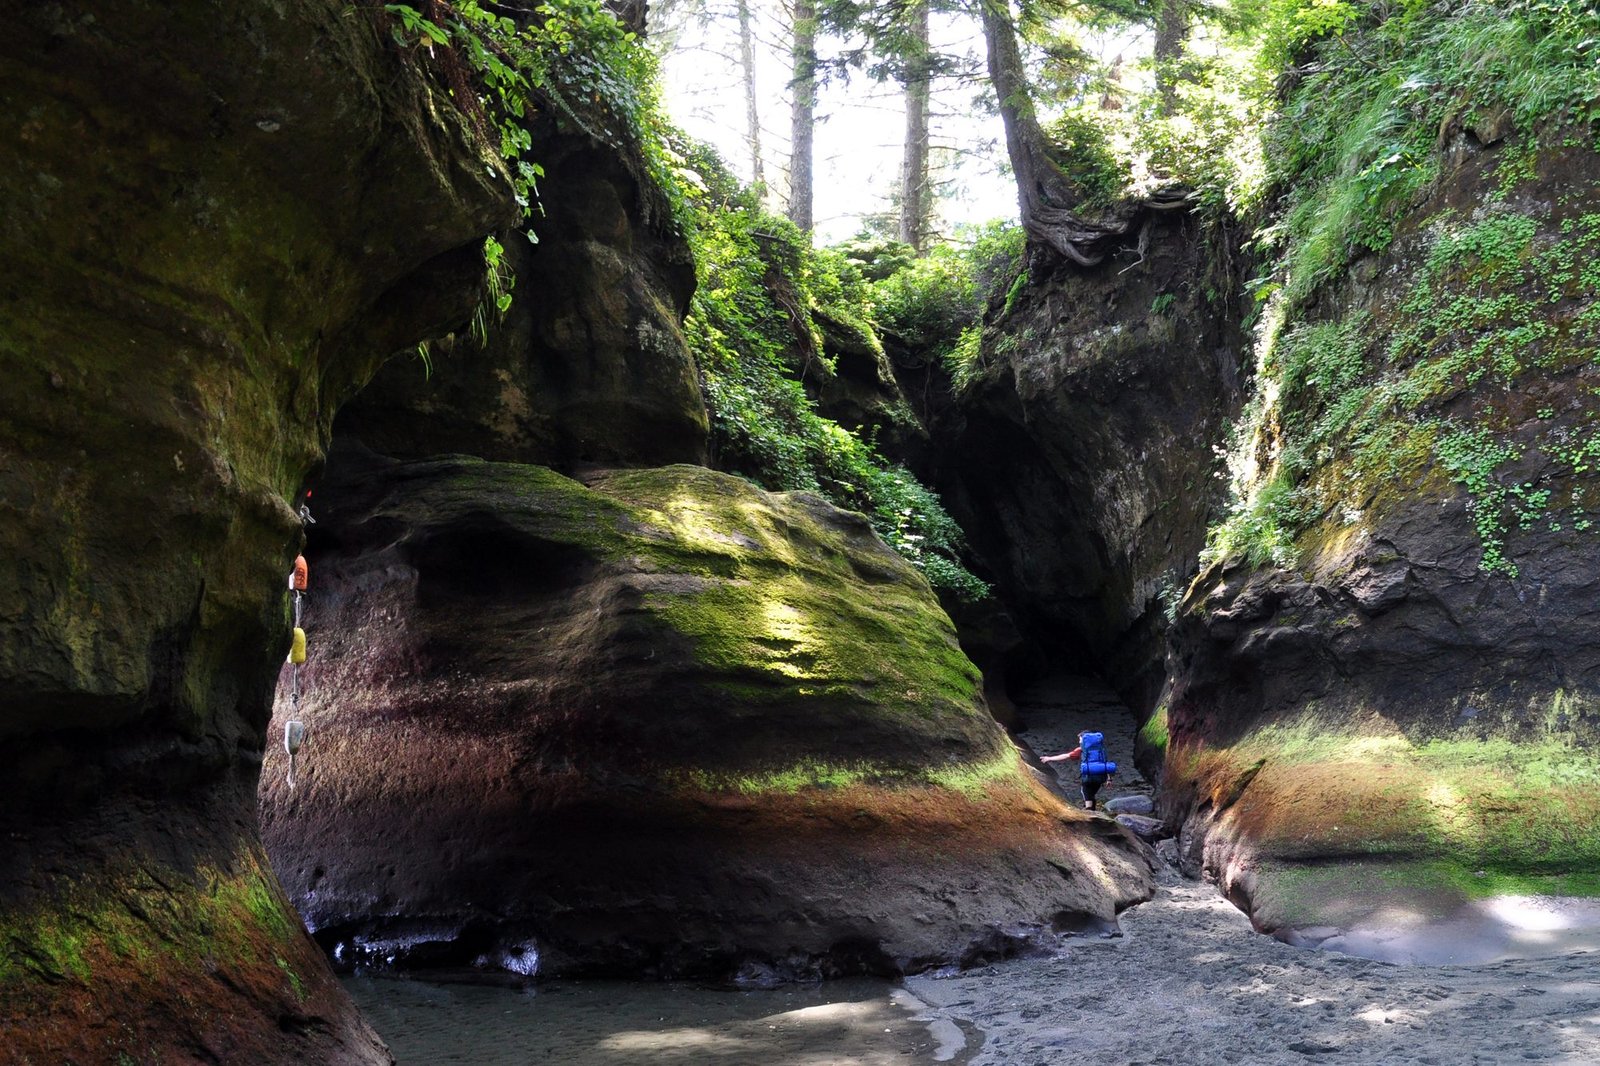
This section has two route options. The coastal route past Owen Point is shorter and dramatic, threading past sea caves and surge channels carved into the sandstone shelf, but it is tide-locked: you need roughly 2.4 metres or lower to pass safely, and 1.8 metres or lower right at Owen Point itself. The alternative forest route avoids the tide dependency but is widely rated among the most physically demanding sections of the entire trail, root-tangled, muddy, and slow. Whichever you choose, check the tide table before you leave camp, not on arrival at the crossing.
Day 3: Camper Bay to Walbran Creek (about 9.2 km, 5 to 8 hours)
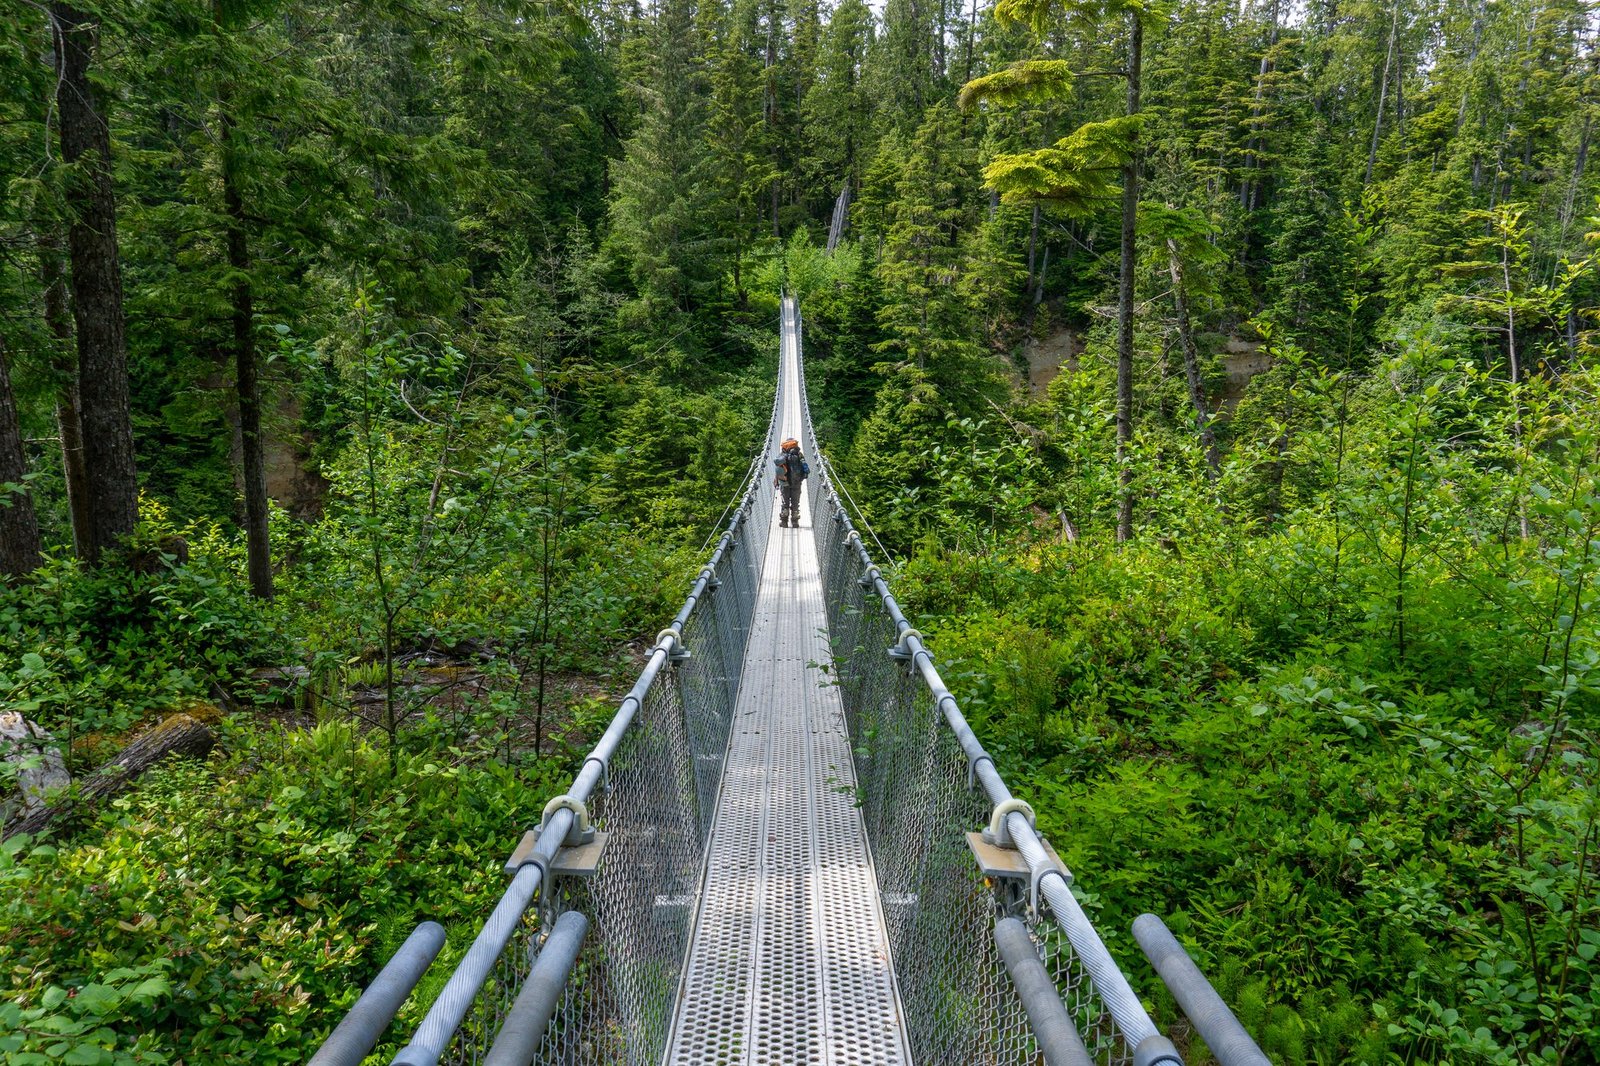
Highlight: The Logan Creek suspension bridge and ladder system.
The Cullite Cove cable car crossing comes first, followed by a stretch trip reports consistently flag as the toughest per-kilometre section of the whole route: long ladder systems, a swaying suspension bridge over Logan Creek, and more of the mud and root-tangle obstacle course that defines the trail’s southern half. This is where a 25 to 30 percent-of-bodyweight pack starts to matter far more than it did on day one.
Day 4: Walbran Creek to Cribs Creek (about 10.5 km, 3.5 to 6 hours)
Highlight: Bonilla Point’s sea stacks and the Carmanah Lighthouse view.
The terrain eases noticeably here, with more genuine beach walking and a real break from the ladder-and-mud pattern of the previous two days. Bonilla Point’s wind-eroded “flowerpot” sea stacks are a signature photo stop, and Carmanah Creek offers a distant view of the still-operating Carmanah Point Lighthouse (the lighthouse grounds themselves are closed to public access under a 2026 Parks Canada order, so this is a view-only stop, not a visit).
Day 5: Cribs Creek to Tsusiat Falls (about 17.6 km, 6 to 9 hours)
Highlight: The Nitinaht Narrows ferry crossing and lunch at the Crab Shack, then Tsusiat Falls itself.
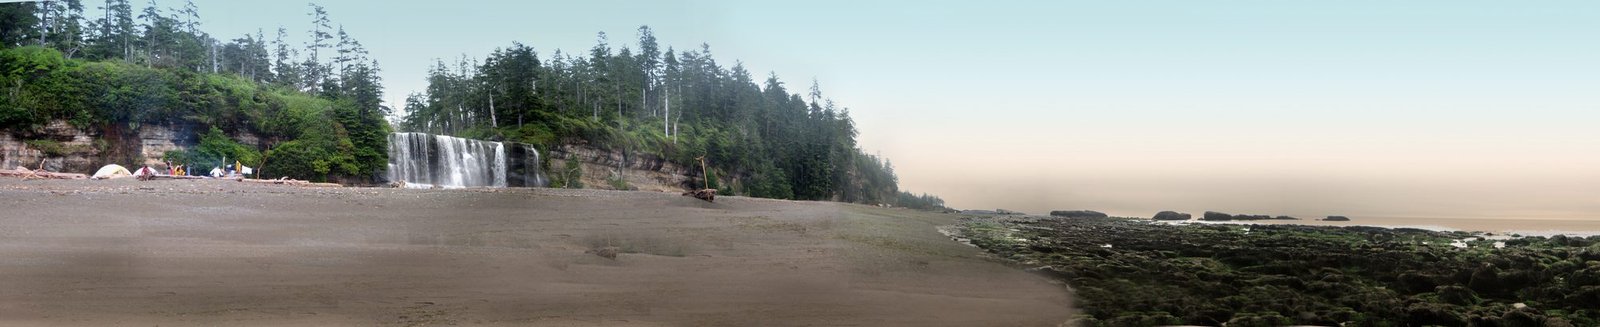
The longest day on this itinerary, built around a hard external deadline: the Nitinaht Narrows ferry runs only 9:30 am to 5:00 pm. The crossing (First Nations-operated, cash fee) is also home to the trail’s best-known food stop, a small operation serving fresh crab and salmon; treat it as a highlight, not a guarantee, since hours and availability can vary by season. Beyond the Narrows, the trail continues to Tsusiat Falls, a genuine waterfall dropping onto the beach and one of the most photographed, and most crowded, campgrounds on the route.
Day 6: Tsusiat Falls to Darling River or Michigan Creek (about 10.9 to 12.9 km, 3.5 to 6 hours)
Highlight: The Klanawa River cable car crossing.
A gentler day, crossing the Klanawa River by cable car and passing Tsocowis Creek before reaching the Michigan Creek or Darling River camping areas. Weathered timber and old machinery along this stretch, remnants of the Dominion Life Saving Trail era, are a reminder of the coastline’s shipwreck history.
Day 7: Darling River or Michigan Creek to Pachena Bay (about 12 to 14 km, 3 to 6 hours)
Highlight: The approach to Pachena Point and the long sandy finish at Pachena Bay.
The easiest day of the trip, mostly forest and beach walking with the elevation and mud of the southern half well behind you. The Pachena Point Lighthouse itself is closed to public visitors under a 2026 Parks Canada order, so this is a pass-by landmark rather than a stop. The trail finishes on Pachena Bay’s long sand beach, with the orientation centre and campground close by.
What to Expect
Terrain: Constantly variable and consistently demanding: broken and missing boardwalk sections, exposed nails, more than 100 ladder systems (some missing rungs), cable car river crossings, deep mud, boulder and cobble beaches, and sandstone shelf. Parks Canada is explicit that damaged infrastructure is a normal trail condition, not an occasional surprise. The southern half, Gordon River to Walbran Creek, is consistently rated the hardest.
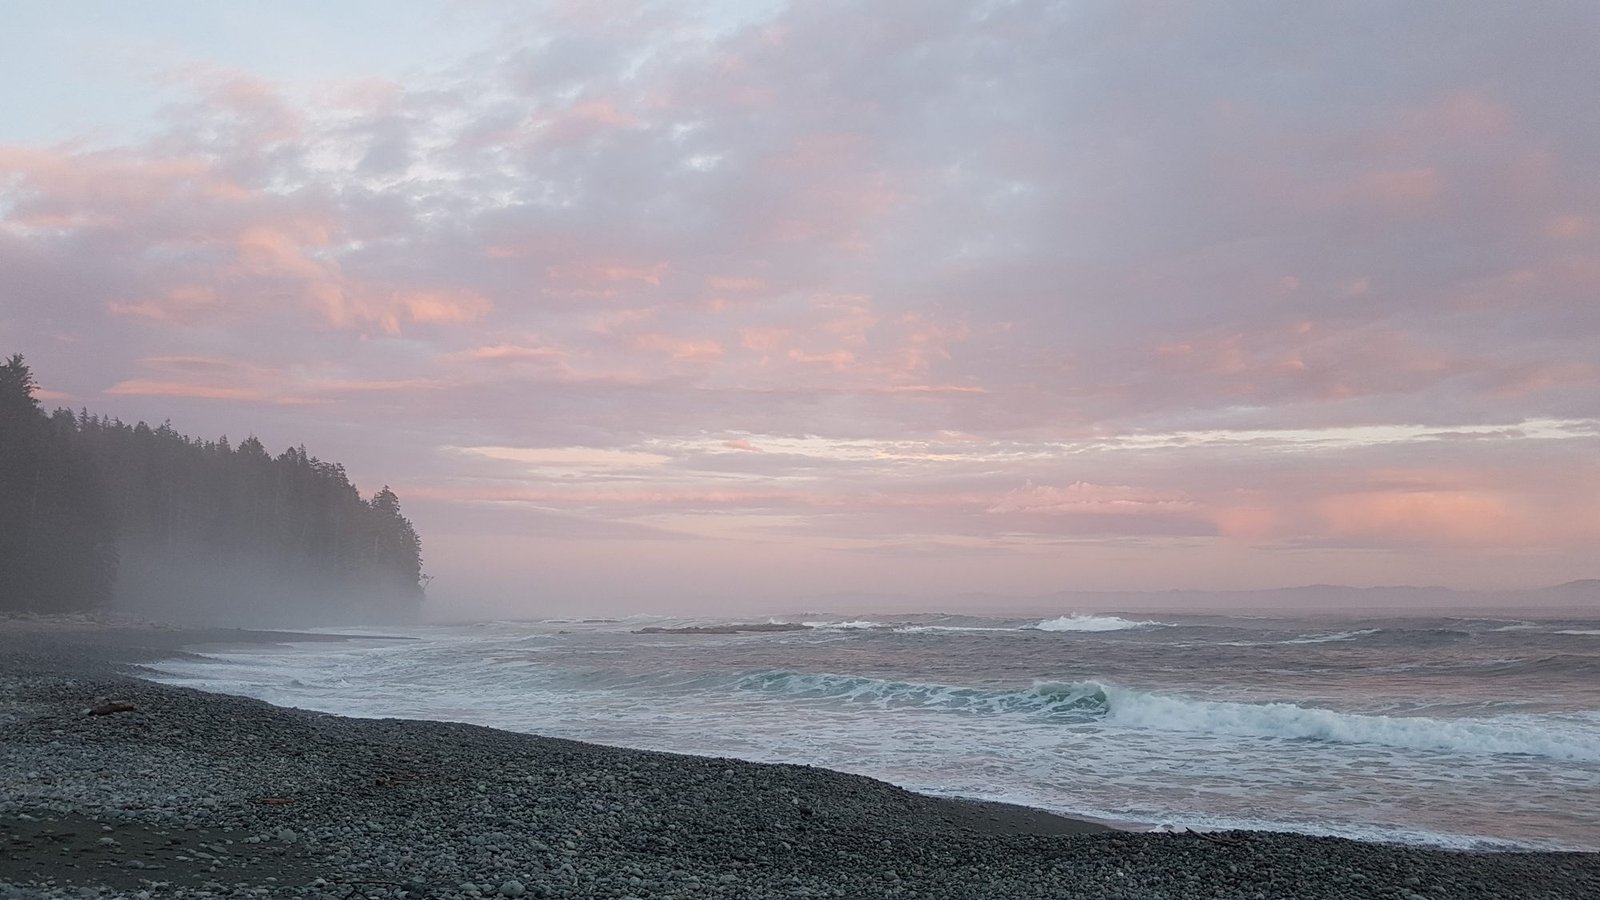
Weather: A temperate rainforest climate with roughly 330 cm (130 inches) of annual rainfall. Average summer daytime temperatures sit around 14°C (57°F), and fog is common, especially in July and August. Cold, wet conditions are the norm to plan for, not the exception, even in the height of summer.
Wildlife: Black bears, wolves, and cougars all use the beaches and trails, and Parks Canada’s 2026 guidance now recommends at least one person per group carry bear spray given a recent rise in human-wildlife encounters. Marine mammals (seals, sea lions) are common along the shore. Do not eat bivalve shellfish (clams, mussels, oysters) gathered on this coast: Paralytic Shellfish Poisoning is a recurring, serious risk.
Crowds: Managed by daily quota, but the most popular campgrounds (Tsusiat Falls, Camper Bay, Walbran Creek) can still see 15 to 25 tents in peak season. Quieter camps such as Cullite Cove or Bonilla Point see far fewer.
Signature features: Tsusiat Falls, the Owen Point sea caves and surge channels, the ladder systems and cable cars themselves, old shipwreck remnants along the beach, and stands of coastal old-growth forest.
Water: sources, safety, and treatment
Water is genuinely abundant on this route: Parks Canada’s own guidance states plainly that drinking water is available from most rivers and creeks along the trail. The official advice is equally plain on treatment: collect upstream of camps and crossings, then purify, boil, or filter before drinking. There is no official claim anywhere that any source on this trail is safe to drink untreated, and with black bear, wolf, and marine wildlife traffic around nearly every water source, treating everything is the sensible default. A standard squeeze or gravity filter (1 micron or finer, effective against giardia and cryptosporidium) handles this trail’s water well; see best water filters for hiking.
A separate hazard, not a drinking-water issue: this coast carries a real Paralytic Shellfish Poisoning risk in wild bivalves. Parks Canada’s guidance is explicit that clams, mussels, and oysters gathered here should not be eaten.
Logistics
Reservations open through Parks Canada’s online system (reservation.pc.gc.ca) or call centre, released in mid-January for the coming season, though the exact release date can shift year to year, so confirm the current date on the Parks Canada site. Fees are itemised per hiker: an Orientation Fee (around $24), the WCT Backcountry Use Permit itself (around $185), a reservation fee ($11.50 per group), applicable ferry fees ($28 per crossing), and a separate National Park Entry Pass (around $12.25 per adult per day, purchased at the trailhead, not at time of booking). Parks Canada notes all fees are subject to change season to season, so check the current schedule before you book.
Every hiker must complete a two-part safety orientation: an online Hiker Safety Primer video sent out one to two weeks before your start date, followed by an in-person briefing at your starting trailhead (available at 10 am and 2 pm daily at Gordon River and Pachena Bay). You can check in and complete this the afternoon before your hike starts, which is worth doing if your travel day runs late. Cancellations 21 or more days out are largely refundable; inside 20 days, only ferry fees remain refundable. Maximum group size is 10.
Mandatory Gear Checklist
For the full kit list with picks and why each one earns its place, see what to pack for the West Coast Trail. The essentials:
- Sturdy, broken-in boots with soft rather than hard soles. Parks Canada’s own gear list is specific on this: soft rubber soles grip the trail’s wet roots, boardwalks, and boulders far better than a stiff hard-soled boot. Never break in new boots on this hike. See best waterproof hiking boots.
- A genuinely waterproof rain jacket. With 330 cm of annual rainfall and the coast’s frequent fog, this is not optional layering, it’s core kit. See best waterproof jackets.
- Waterproof rain pants. Parks Canada’s list calls for jacket and pants together. See best rain pants for hiking.
- Gaiters, for the mud, loose sand, and boulder-hopping that define much of the route. See best hiking gaiters.
- Trekking poles, genuinely useful for balance on ladders’ approaches, log crossings, and unstable footing throughout. See best trekking poles.
- Bear spray. Parks Canada’s 2026 guidance recommends at least one person per group carry it and know how to use it, given rising human-wildlife encounter reports. See best bear sprays.
- A reliable water filter, since no source on this trail is stated as safe to drink untreated. See best water filters for hiking.
- A dry bag or dry sack for your permit, phone, and electronics, given the cable car crossings, river fords, and coastal spray on this route. No dedicated dry bag article exists on the site yet (logged catalogue gap).
- A current tide table (Tofino reference) and a watch. Issued at your trailhead orientation, but treat it as the single most important piece of planning gear on this trail, free or not.
- A synthetic-fill sleeping bag, since down loses warmth fast if it gets wet, which is a real risk on a trail this consistently damp.
Honest Assessment
This trail is for experienced multi-day backpackers only, and Parks Canada says so in almost exactly those words. It suits hikers who are comfortable carrying a full pack over sustained rough terrain for a week, flexible enough to lose a day or two waiting out a flooded creek or a bad tide window, and genuinely fit for climbing more than 100 ladder systems back to back.
It is not for hikers with no prior multi-day experience, recurring knee, back, or ankle problems, or serious heart or breathing conditions; Parks Canada lists these as explicit disqualifiers, not soft cautions. Hikers who want a gentler taste of the same coastline can look at the Juan de Fuca Marine Trail, one of Parks Canada’s own suggested alternatives, or book a shorter 3 to 5 day trip from the Nitinaht Narrows midpoint instead of the full 75 km traverse.
Among experienced Canadian backpackers, the consensus holds up: this is widely rated one of the hardest, and most rewarding, multi-day hikes in the country. It asks a lot in return for what it gives.
Final Thoughts
The West Coast Trail rewards the same discipline as any tide- and terrain-dependent trip: read the tide chart daily, respect the ferry timetables, and never underestimate how long the southern sections actually take. If you’re still building toward a trip with this much logistics and physical demand, multi-day hiking skills is worth reading before you book, and how to plan your first multi-day hike covers the groundwork this trail assumes you already have. Hikers drawn to tide-dependent coastal treks may also want to look at California’s Lost Coast Trail, a similar tide-chart-first hike on a very different coastline. And before you go, run through what to pack for the West Coast Trail so your kit is dialled in for the ladders, the rain, and the tide windows.
Frequently Asked Questions
How much does it cost to hike the West Coast Trail?
Budget roughly $250 to $300 per person in Parks Canada fees alone (permit, orientation, reservation, ferries, and daily park entry), plus transport, food, and any gear you still need to buy, and check the current Parks Canada fee schedule since fees are revised season to season.
Do I need a bear canister on the West Coast Trail?
No hard-sided canister is required. Food storage is via metal food lockers or bear poles provided at each designated campground; if none are available, hang food, garbage, and toiletries well away from your tent. Bear spray is recommended, not mandatory, as of the 2026 guidance.
Can beginners hike the West Coast Trail?
Not recommended. Parks Canada explicitly states the trail is not suitable for hikers with no prior multi-day backpacking experience. The ladders, tide-dependent sections, and remote terrain reward hikers who already have a multi-day trip or two behind them.
What’s the best month to hike the West Coast Trail?
The trail is only open May 1 through September 30. Late July and August bring the most stable weather but also the most fog and the highest crowds at popular campgrounds; May, June, and September are quieter but wetter, with a higher chance of creek crossings running high.
How does the West Coast Trail compare to other tough North American trails?
It’s shorter in distance than most multi-day classics (75 km) but consistently rated harder per kilometre, thanks to the ladder systems, cable cars, tide-dependent sections, and southern-half terrain that can slow hikers to 1 to 2 km/h. Injury and evacuation rates (60 to 80 serious cases a year, per Parks Canada) are meaningfully higher than on most groomed national park trails.
