

Last updated: August 2026
Wild Trail Hiker is reader-supported. We may earn a commission when you buy through links on this page, at no extra cost to you. We only recommend products we’d consider taking on a multi-day trip ourselves.
Before You Go
A hard-sided bear canister has been mandatory across the entire Lake Tahoe Basin, not just the wilderness sections, since January 2024. Desolation Wilderness, the trail’s one genuinely remote stretch, requires a permit for both day and overnight use, and 2026 brought a new dedicated Tahoe Rim Trail Thru-Hike Permit with its own 10-person nightly quota. Campfires are banned everywhere on the trail, and even a camp stove needs a free California campfire permit. None of these are optional extras. Sort them before you sort your itinerary.
Why This Trail
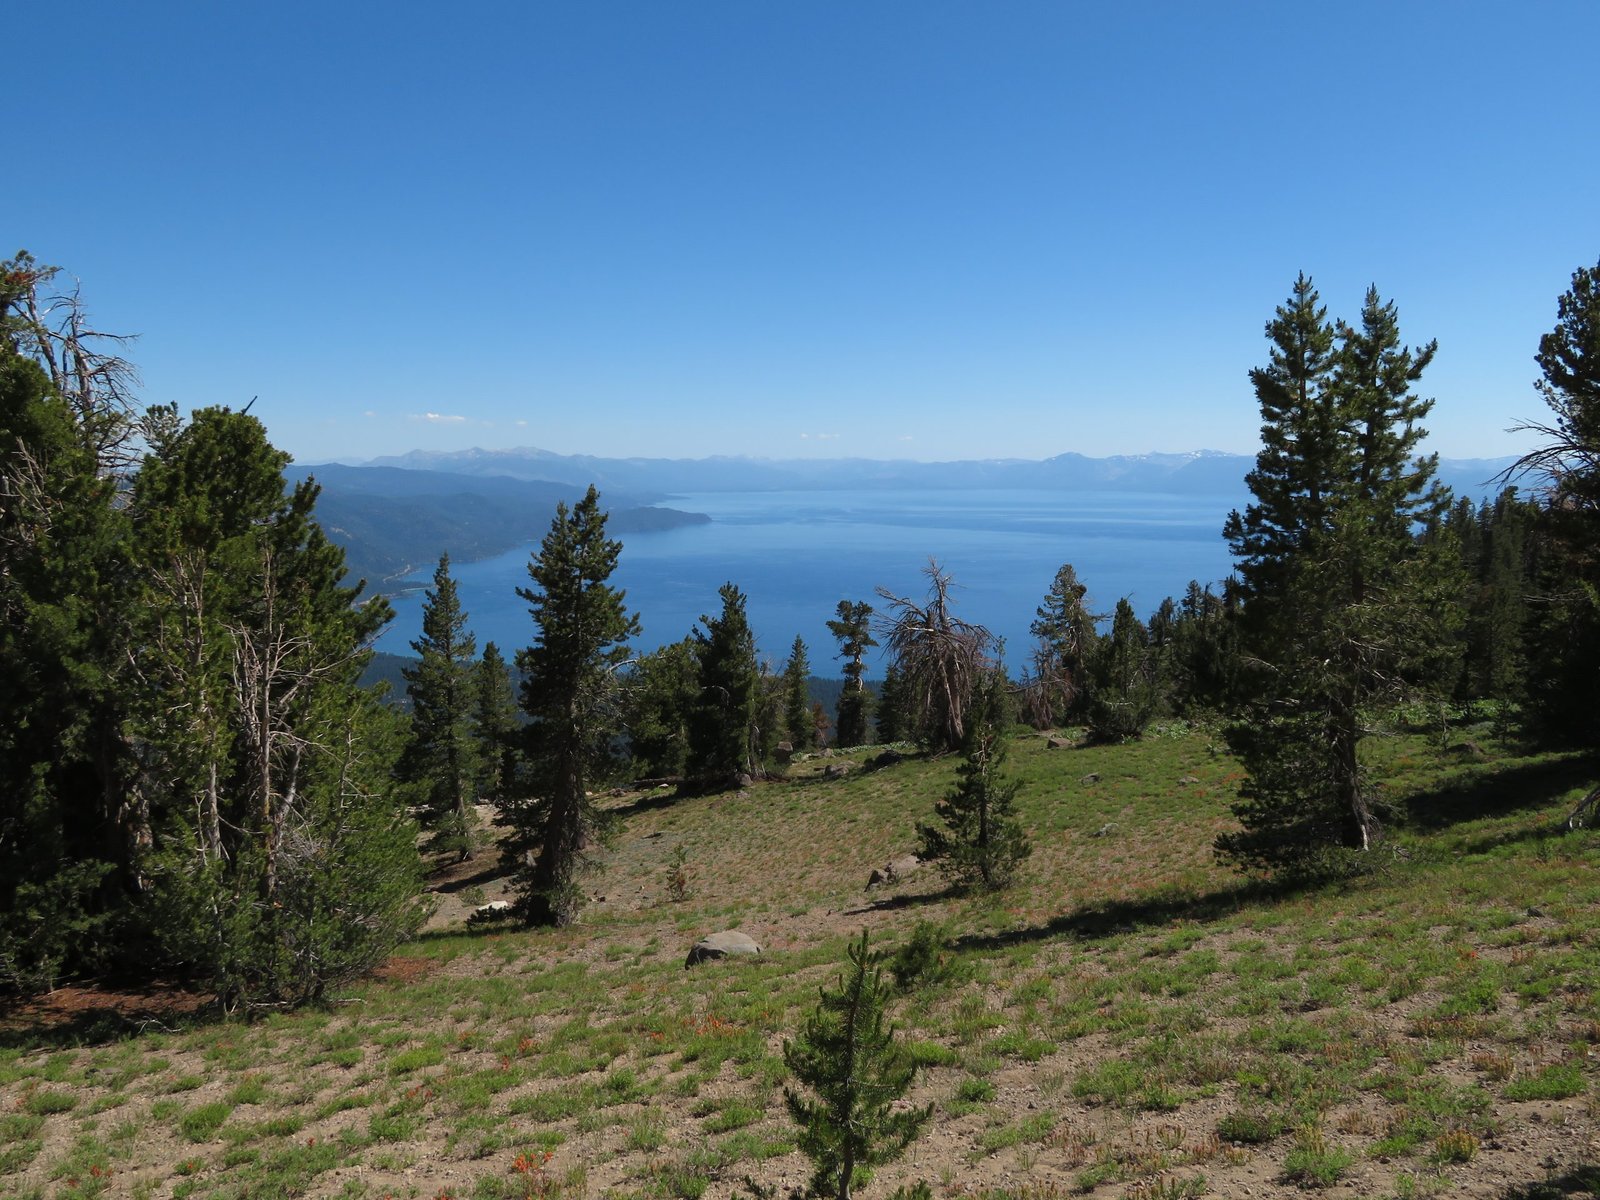
The Tahoe Rim Trail circles Lake Tahoe rather than climbing toward it. That single difference sets it apart from most Sierra classics: instead of a pass, a summit, or a chain of lakes as the destination, the lake itself is the constant companion, visible from the trail on most days of the loop. Roughly 174 miles of singletrack cross two states and three national forests, threading through the Desolation, Mount Rose, and Granite Chief wilderness areas and sharing about 50 miles of tread with the Pacific Crest Trail along the west shore.
It has a reputation as one of the more approachable American long trails. Treeline Review, in its backpacking guide to the route, calls it “a good choice for first thru-hike or as a shorter thru-hike for hikers with shorter vacations,” and that reputation is earned: the trail is unusually well marked, road crossings mean resupply is realistic without a support crew, and the elevation gain, while real, comes in rolling stretches rather than sustained alpine grinds. What the TRT is not is undemanding. The route touches 10,338 feet at Relay Peak, its high point, and totals close to 28,000 feet of cumulative gain over the full circuit, since every foot lost has to be climbed back.
Variety is the other selling point. Granite basins and glacier-carved lakes in Desolation Wilderness give way to the volcanic ridgelines and wide-open views of the Carson Range on the Nevada side, then wildflower meadows and aspen groves closer to Tahoe City. Few long trails in the country change character this much while circling back to the same trailhead.
Trail at a Glance
- Distance: Approximately 174 miles (280 km), based on the Tahoe Rim Trail Association’s current segment-by-segment mileage table. Older references and the trail’s own “165-Mile Club” name cite 165 to 170 miles; the Association notes the total shifts slightly most years as reroutes and trail projects are completed, so treat any single figure as an approximation.
- Duration: 7 to 14 days depending on pace. This guide follows a 9-day, 8-night itinerary, a common pace for fit multi-day hikers who want to finish inside a long week off work.
- Difficulty: Hard. No single obstacle defines the trail, but sustained elevation, a high point above 10,000 feet, long dry stretches, and one permitted wilderness section add up to a serious undertaking, not a casual walk.
- Best season: July through September. High-elevation snow can linger into July in a heavy year, and by September some of the trail’s water sources have dried up for the season.
- Permits: Only required for Desolation Wilderness. A new TRT Thru-Hike Overnight Permit (Zone 46) launched in 2026 specifically for hikers completing the full loop, quota 10 permits per night, entry only at Echo Lakes or Richardson. A free California campfire permit is required trail-wide for camp stove use.
- Start / end trailhead: Echo Lakes Trailhead, El Dorado National Forest (loop trail, same point both directions): Echo Lakes Trailhead on Google Maps
Because this is a loop, most thru-hikers pick whichever trailhead suits their logistics. Echo Lakes is a common choice: it locks in the Desolation Wilderness permit early in the trip while dates are firm, and starts hikers in a water-rich stretch before the drier Nevada-side segments later on. This guide follows that clockwise, Echo-Lakes-first order.
Trail Map
View the Tahoe Rim Trail complete loop on AllTrails: includes an elevation profile, current condition reports, and reviews from hundreds of hikers who’ve done the full circuit.
Official Tahoe Rim Trail maps and segment info, Tahoe Rim Trail Association: interactive trail map plus free downloadable segment maps and GPX/KMZ centerline files for all eight official segments.
Getting There and Away
Getting there: Because this is a loop, “getting there” and “getting away” both point back to the Echo Lakes Trailhead near South Lake Tahoe. The nearest major airport is Reno-Tahoe International (RNO), roughly 72 miles and about 1.5 to 2 hours by road. Sacramento International (SMF) is the secondary option, around 100 miles and 2 to 2.5 hours away, useful if Reno fares run high.
The South Tahoe Airporter runs scheduled service from RNO to the casino district in South Lake Tahoe for a fixed fare. From South Lake Tahoe, the Echo Lakes Trailhead itself is a further 10-mile drive up Highway 50 and Johnson Pass Road, not directly served by the Airporter, so budget for a taxi, rideshare, or a rental car for that last leg. Driving yourself from either airport is the simplest option if you want the flexibility to stage gear the night before. The trailhead has seasonal, unpaved parking (typically open mid-May to mid-October) and no potable water on site.
Getting away: Same trailhead, since this is a loop.
Staging towns: South Lake Tahoe, about 10 miles from the trailhead, has the fullest range of lodging, groceries, gear shops, and showers, and is the natural base the night before and after the hike. Tahoe City, roughly a third of the way around the loop, doubles as a mid-route resupply stop with a grocery store, restaurants, and its own transit station.
Day-by-Day Breakdown
This breakdown follows a clockwise, 9-day, 8-night itinerary starting and ending at Echo Lakes, built around the Tahoe Rim Trail Association’s eight official trail segments. It splits the longest segment, Echo Lakes to Barker Pass through Desolation Wilderness, into two days, since most hikers use both of their permitted wilderness nights there anyway. Faster hikers cover the loop in 7 days at close to 25 miles a day; more relaxed schedules stretch it to 12 to 14 days using the trail’s many road-crossing access points to break the trip into shorter chunks.
Day 1: Echo Lakes into Desolation Wilderness, toward Dicks Pass (about 16 miles)
Highlight: Lake Aloha, a sprawling, island-studded lake set in bare granite.
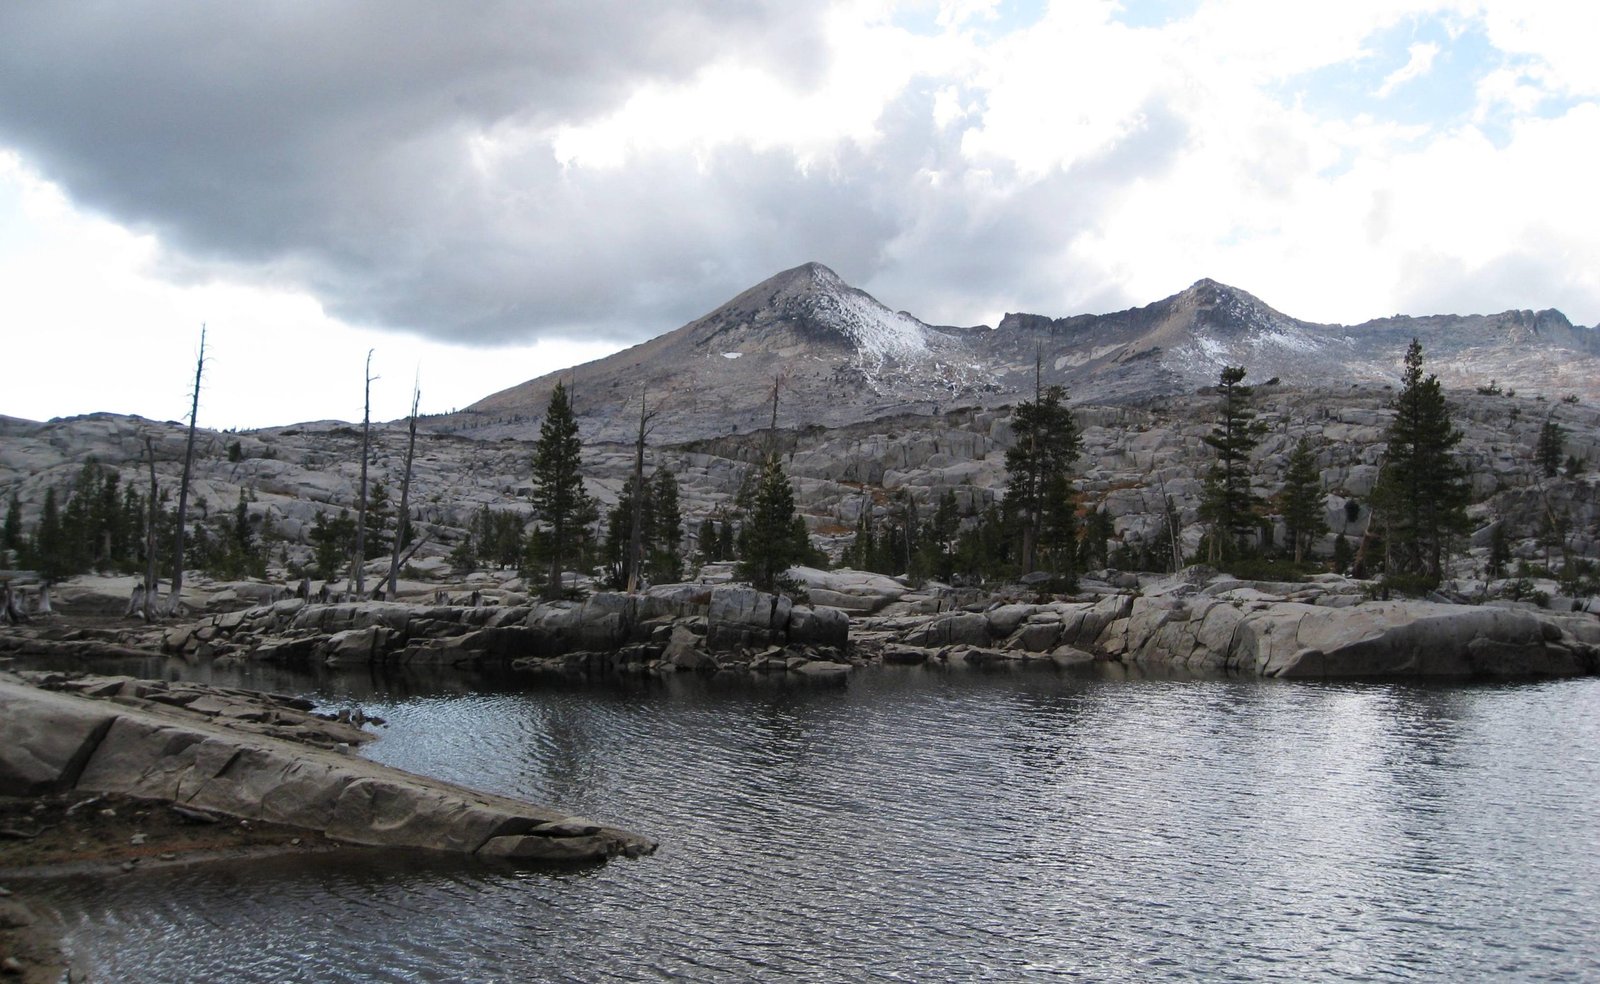
The trail leaves Echo Lakes Trailhead on shared tread with the Pacific Crest Trail and climbs almost immediately into the glacially polished granite of Desolation Wilderness. Streams and small lakes appear regularly through pine groves and flower-filled meadows before the trail opens onto Lake Aloha, a highlight of the entire loop with clear water, a scattering of granite islands, and reliable swimming and camping spots. The climb toward Dicks Pass, roughly the midpoint of this 32.5-mile segment, is long and steady with big views back over the lake basin.
Day 2: Dicks Pass to Barker Pass (about 16.5 miles)
Highlight: The Velma Lakes, and the transition out of Desolation Wilderness.
The remainder of the Echo-to-Barker segment crosses Dicks Pass, the segment’s high point, then drops past the Velma Lakes into noticeably drier, more forested terrain as the trail leaves the wilderness boundary. The trail rolls gently down toward Richardson Lake and several dirt-road crossings before reaching Barker Pass Trailhead, a common resupply and water-cache point for thru-hikers.
Day 3: Barker Pass to Tahoe City (16.4 miles)
Highlight: Page Meadows in wildflower season.
The trail dips through Ward Canyon on a steep, forested descent before climbing back out and easing into Page Meadows, known locally for spring and summer wildflowers and reliable fall color. From there it’s a last easy stretch down to the banks of the Truckee River and into Tahoe City itself, a genuine town stop with groceries, restaurants, and a transit station if a break is needed.
Day 4: Tahoe City to Brockway Summit (20.5 miles)
Highlight: The Lava Cliffs overlook above Lake Tahoe’s north shore.
Leaving Tahoe City, the trail climbs steadily through fir, cedar, and aspen, crossing open hillsides thick with manzanita before reaching the Lava Cliffs, a standout viewpoint over the lake and the peaks along the north shore. The trail then drops to Watson Lake, a shallow, wildflower-fringed lake good for a swim or a fishing break, before rolling gently on through meadows and forest to Brockway Summit.
Day 5: Brockway Summit to Mt. Rose Summit / Tahoe Meadows (20.2 miles)
Highlight: Relay Peak, the highest point on the entire trail at 10,338 feet.
The trail climbs away from Brockway into fragrant conifer stands, crosses into Nevada and the Humboldt-Toiyabe National Forest, and enters the volcanic terrain of the Mount Rose Wilderness. Relay Peak, the trail’s high point, delivers close to horizon-spanning views across the Tahoe Basin and northwest toward Mount Lassen on a clear day. A short spur trail (0.7 miles round trip) climbs to the summit of Mount Houghton for hikers with energy to spare. The descent passes the trail’s highest waterfall, at roughly 130 feet, before reaching the Mt. Rose trailhead at Tahoe Meadows.
Day 6: Mt. Rose Summit to Spooner Summit (24.1 miles)
Highlight: Marlette Lake and the Christophers Loop viewpoint over Sand Harbor.
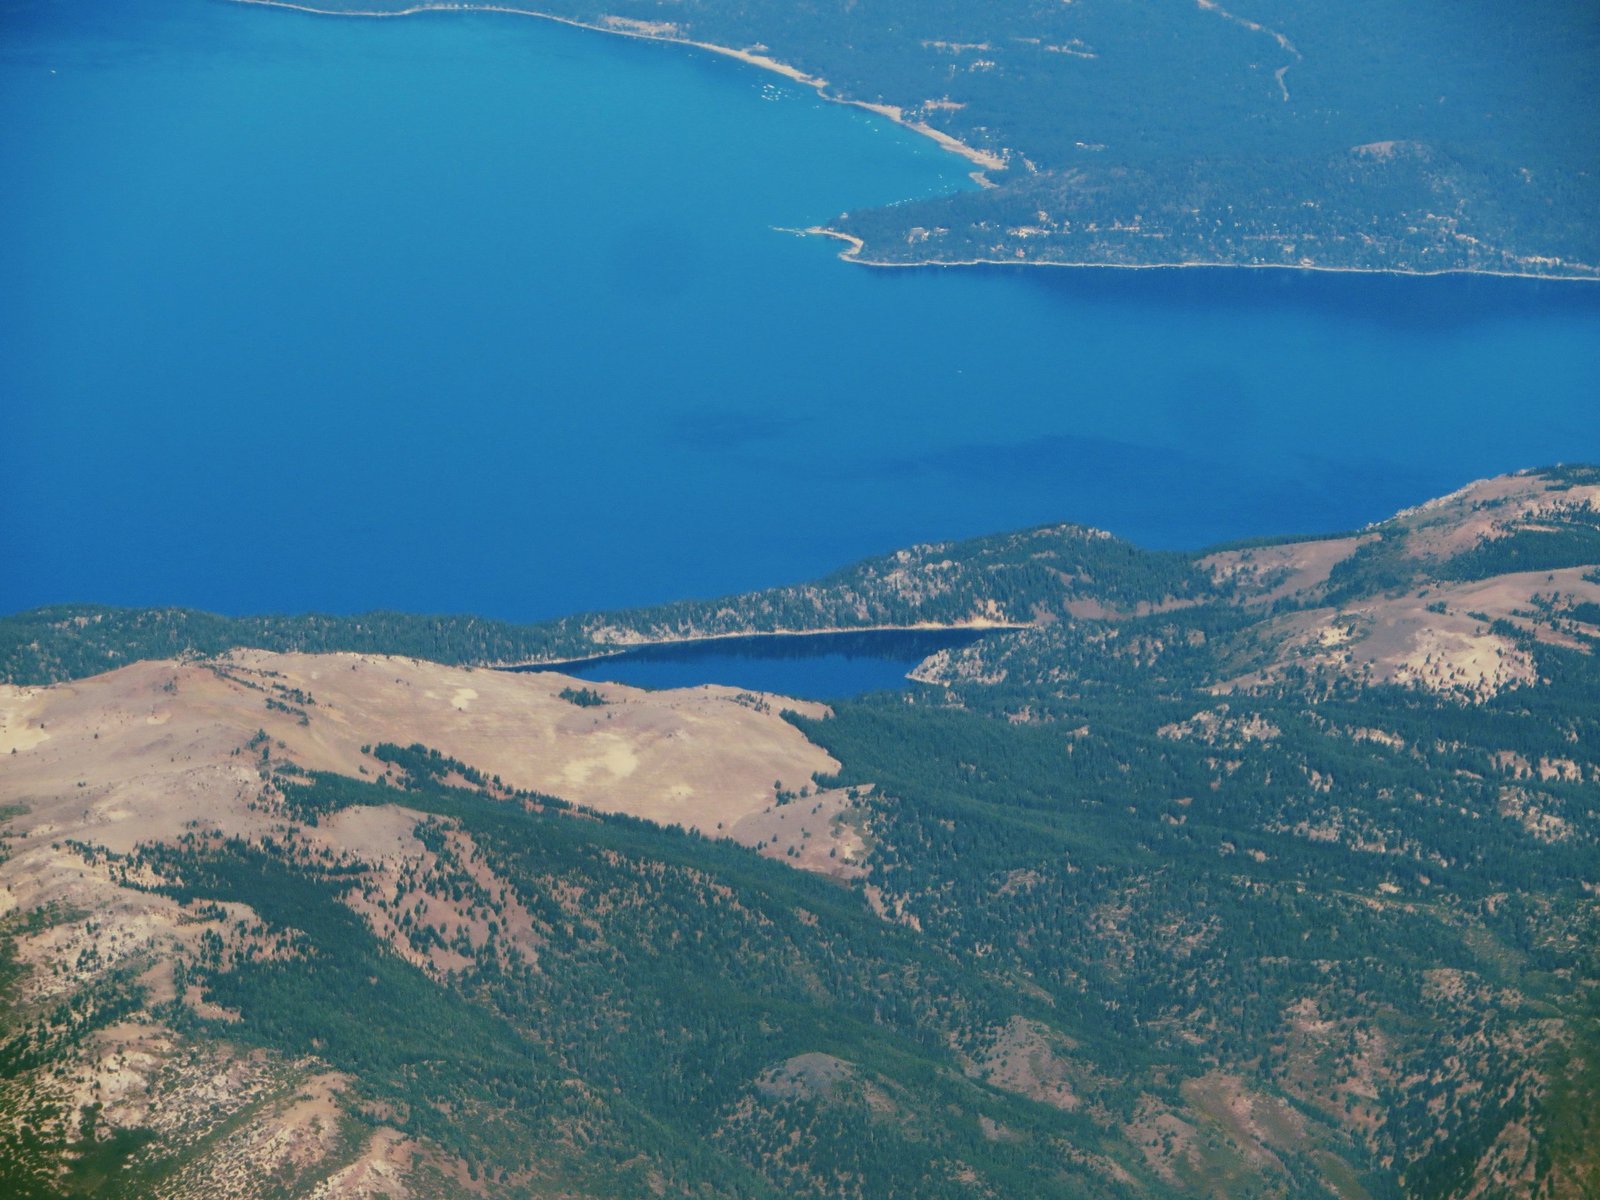
The longest day of this itinerary rolls through Lake Tahoe Nevada State Park, past Marlette Lake and the historic flumes once used to supply water to Comstock-era mining. A spur trail leads to Christophers Loop, widely regarded as the most photographed viewpoint on the entire trail, perched above Sand Harbor’s translucent shallows. The segment’s high point, Snow Valley Peak at 9,214 feet, offers sweeping views before the trail eases back into forest on the approach to Spooner Summit, where bathrooms and running water are available near Spooner Lake.
Day 7: Spooner Summit to Kingsbury South (19.0 miles)
Highlight: A ridge traverse near South Camp Peak with views down the full length of Lake Tahoe.
Switchbacks lead up from Spooner Summit through old-growth fir and across small meadows before a long traverse up South Camp Peak (8,866 feet) reaches the segment’s highest point at roughly 8,830 feet, with a view stretching the entire length of the lake. A dirt road near South Camp Peak leads to a spur up Genoa Peak for hikers wanting an extra overlook of the Carson Valley. The trail then descends toward Kingsbury South, close to the Heavenly Ski Resort area and a realistic resupply point.
Day 8: Kingsbury South to Big Meadow (22.9 miles)
Highlight: Star Lake, framed by Freel Peak, Jobs Peak, and Jobs Sister.
From Kingsbury the trail climbs through dense red fir and white pine, survivors of the Comstock-era logging that cleared much of the surrounding range, then opens onto ridges and rocky outcrops with wide Carson Valley views. Star Lake, tucked below three of the highest peaks in the Tahoe Basin, is a popular camp with good fishing and swimming, and a worthwhile side trip for hikers with a spare day to bag Freel Peak. The trail then winds through old-growth juniper and granite passes before dropping gently to the Big Meadow trailhead.
Day 9: Big Meadow to Echo Lakes (18.3 miles)
Highlight: Showers Lake, and rejoining the Pacific Crest Trail through Meiss Meadows.
The final day rolls south across grassy meadows and past Round Lake, tucked beneath high cliffs, before the trail merges again with the Pacific Crest Trail and swings through flower-filled Meiss Meadows alongside the headwaters of the Upper Truckee River. Showers Lake, ringed by granite, is a good last swim before a steep, rocky descent back down to Echo Summit and the trailhead, closing the loop.
What to Expect
Terrain: Mostly hard-packed dirt and gravel singletrack, well maintained and clearly marked throughout, with a few sections of loose shale near Relay Peak in the Mount Rose Wilderness. Elevation change tends to come in rolling ups and downs rather than one sustained climb, though road crossings often sit lower than the ridge, meaning a climb back up to the rim after each one. Early-season hikers should expect a handful of shin-deep seasonal stream crossings.
Weather: Summer daytime highs typically sit in the 70s°F, with overnight lows in the 40s to 50s°F, colder at the higher camps. Snow and freezing temperatures are possible in any month at elevation, and the Sierra’s classic afternoon thunderstorms can build fast in summer, so plan exposed ridge sections for the morning where possible.
Wildlife: Black bears are present across the entire basin, which is why canister storage is now mandatory trail-wide, not just in wilderness. Mule deer, marmots, and coyotes are commonly seen. No grizzlies in this range.
Crowds: The TRT is a multi-use trail shared with mountain bikers (on roughly half its length) and equestrians (nearly all of it), so solitude is not the draw here. Weekends near the road-accessible trailheads, especially Tahoe City and Kingsbury, see meaningful day-use traffic. The Desolation Wilderness stretch, gated by permit quota, stays comparatively quiet even in peak season.
Signature features: Lake Aloha, Relay Peak, the Christophers Loop viewpoint over Sand Harbor, Marlette Lake, Star Lake, and near-daily views of Lake Tahoe itself from ridgelines around the basin.
Water: sources, safety, and treatment
Water availability varies a lot by section. The Mt. Rose to Spooner Summit and Spooner Summit to Kingsbury South segments are consistently flagged as the driest stretches on the trail, and by September, several of the trail’s smaller seasonal sources dry up entirely, particularly on the Nevada side away from the lake. Check the Tahoe Rim Trail Association’s current water source reports before setting out on those segments, and plan to carry more than usual through them. Desolation Wilderness and the western half of the loop, by contrast, have frequent lakes and streams for most of the season.
No water on this trail should be treated as safe to drink without treatment. This is a heavily used, multi-use trail corridor with stock traffic in places, and giardia risk applies even to water that looks clean at altitude. A standard squeeze or gravity filter handles the trail well; a couple of thru-hikers documented in trip reports store their filter inside their sleeping bag overnight in shoulder-season conditions to stop it freezing. A water filter rated for backcountry use is standard kit here.
Water source conditions change through the season and year to year with snowpack. Cross-check the Association’s live water source page for the specific segments and dates of your trip before finalizing your carry plan, especially for a September hike.
Logistics
The only permit bottleneck on this trail is Desolation Wilderness. For 2026, thru-hikers apply for the new TRT Thru-Hike Overnight Permit (Zone 46) through recreation.gov, choosing a direction of travel and an entry point of either Echo Lakes or Richardson. The quota is 10 permits per night, reservations open up to 6 months in advance, and permits can be accessed and printed up to 14 days before the trip. Permit holders get a maximum of 2 nights in the wilderness, must camp within 300 feet of the PCT/TRT corridor, and cannot camp at Lake Aloha.
Outside Desolation Wilderness, no permit is required to hike or camp on the TRT, though a free California campfire permit (from readyforwildfire.org) is mandatory for camp stove use anywhere on the trail, including the Nevada side. Campfires themselves are banned along the entire route. A hard-sided bear canister is required basin-wide as of January 2024; canisters can be rented at the Taylor Creek Visitor Center in South Lake Tahoe or the Placerville Ranger Station.
Mandatory Gear Checklist
- A hard-sided bear canister. Required across the entire Lake Tahoe Basin since January 2024, not just in designated wilderness. See best bear canisters for multi-day hiking.
- A reliable water filter, since no source on this trail is safe to drink untreated and some sections run genuinely dry by late summer. See best water filters for hiking.
- Trekking poles, useful across the trail’s rolling terrain and the steeper granite descents near Relay Peak and South Camp Peak. See best trekking poles.
- An insulated jacket for camp. Overnight lows regularly drop into the 40s°F, colder at the higher camps, even in peak summer. See best insulated jackets for hiking.
- A wearable bug head net. Mosquitoes are worst in June and early July per the Tahoe Rim Trail Association’s own seasonal guidance; a July start is recommended partly to avoid the worst of them. See best bug nets for camping.
- A printed topographic map or guidebook, plus a compass. The trail is well marked, but cell coverage is unreliable to nonexistent for long stretches, and the Association explicitly recommends not relying on a phone for navigation.
For the complete kit built specifically for this loop, from the basin-wide bear canister rule to the driest Nevada-side stretches, see What to Pack for the Tahoe Rim Trail.
Honest Assessment
This trail suits hikers who want a genuine multi-day or thru-hike experience without three weeks off work: it is well marked, resupply-friendly at multiple road crossings, and offers big scenery most days without demanding technical skills or off-trail navigation. It is a sensible first thru-hike for someone who has already done a few overnight trips and wants to step up in duration and elevation.
It is not the trail for hikers chasing true backcountry solitude. Roughly half the route is open to mountain bikes and nearly all of it to horses, and the road-accessible trailheads see real weekend day-use traffic. Hikers wanting the Sierra’s more committing granite-and-pass character, without the multi-use crowds, are better served by a trail like the John Muir Trail or the Rae Lakes Loop. For a shorter taste of the TRT itself, any of its eight official segments works as a standalone overnight or multi-day trip without the full-loop permit and logistics.
Final Thoughts
The Tahoe Rim Trail rewards hikers who plan around its two real constraints, the Desolation Wilderness permit quota and the driest Nevada-side water sections, and otherwise offers one of the more forgiving entry points into long-distance hiking in the country. Start with how to plan your first multi-day hike if this would be your first trip at this length. If you want the deeper, more committing granite-and-alpine-lake country the Tahoe region is famous for, our John Muir Trail and Rae Lakes Loop guides cover two of the classic High Sierra routes a range further south.
Frequently Asked Questions
How long does it take to hike the Tahoe Rim Trail?
Most thru-hikers finish in 7 to 14 days. A fast, light pace covers the roughly 174-mile loop in about a week; a more relaxed schedule using the trail’s multiple road-crossing access points stretches it to 12 to 14 days.
Do I need a permit for the Tahoe Rim Trail?
Only for Desolation Wilderness, both day and overnight use. Thru-hikers apply for the new 2026 TRT Thru-Hike Overnight Permit (Zone 46) through recreation.gov, with a 10-person nightly quota and a maximum stay of 2 nights in the wilderness. No permit is required elsewhere on the trail, though a free camp stove permit applies trail-wide.
What’s the best month to hike the Tahoe Rim Trail?
July is generally recommended for the best balance of flowing water and manageable mosquitoes. June and early July tend to have heavier mosquito pressure, and by September some water sources, especially on the drier Nevada side, have dried up for the season.
Is the Tahoe Rim Trail good for a first thru-hike?
Yes, it’s commonly recommended as one of the more approachable long trails in the country: well marked, resupply-friendly at road crossings, and shorter than most classic thru-hikes. It still demands real fitness, elevation tolerance, and careful water planning.
Which direction should I hike, clockwise or counter-clockwise?
Either way covers the same total elevation gain and loss, since it’s a loop. Most thru-hikers go clockwise, and many choose to save Desolation Wilderness, a favorite section, for later in the trip. Water availability on the drier Nevada-side segments is worth factoring into the order either way.
