

Last updated: July 2026
Wild Trail Hiker is reader-supported. We may earn a commission when you buy through links on this page, at no extra cost to you. We only recommend products we’d consider taking on a multi-day trip ourselves.
Before You Go
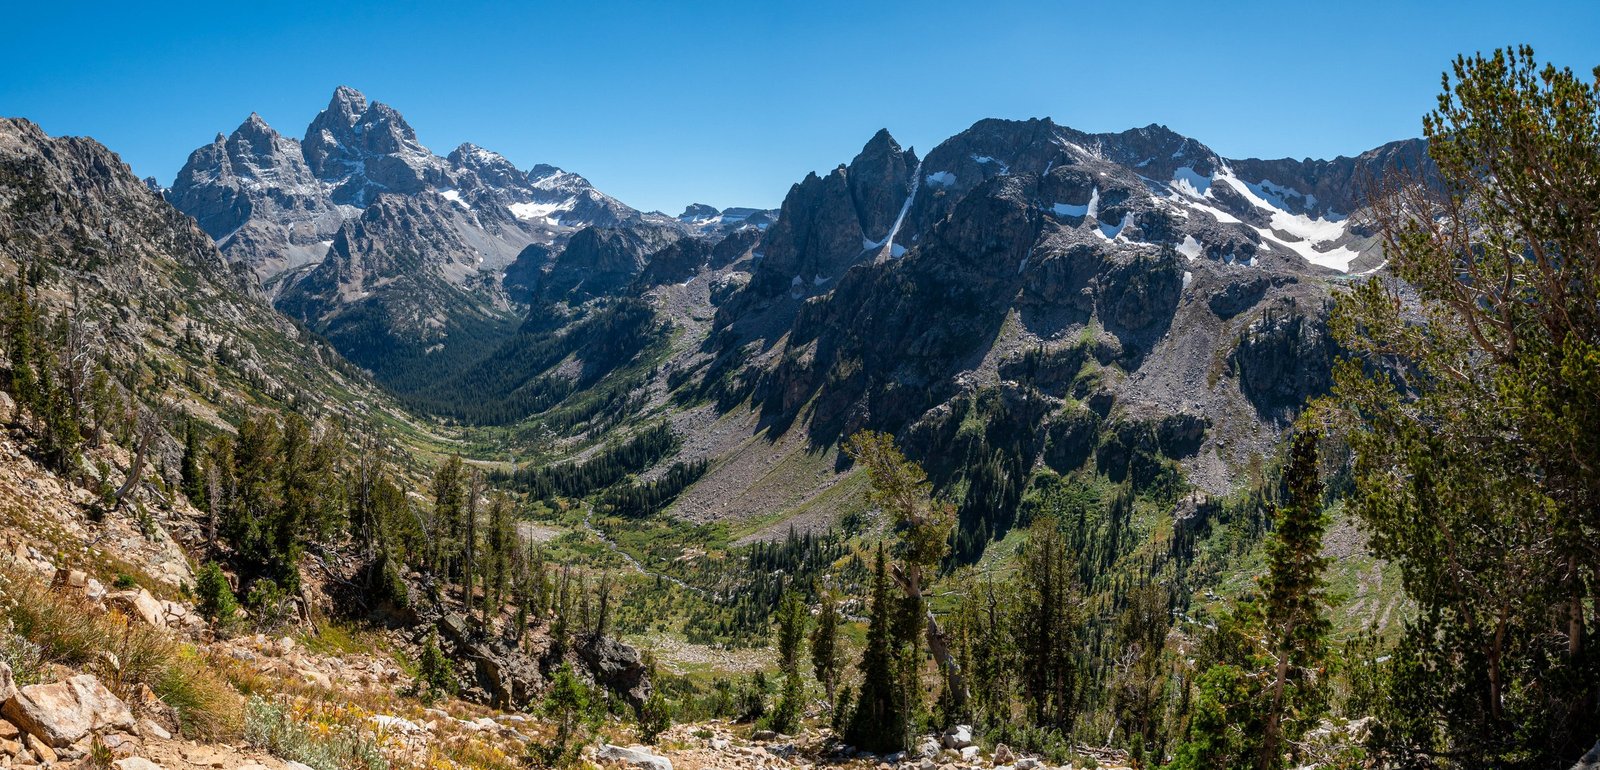
The Teton Crest Trail runs roughly 40 miles through the western side of Grand Teton National Park, and it packs more high-alpine scenery per mile than almost anything else in the Lower 48. Every backcountry night here requires a permit, and Grand Teton hands out only a third of its camping-zone reservations in advance, on a single narrow window in early January. The rest go to walk-up hikers who show up at a permit desk with a flexible itinerary. This is a trail that rewards planning, but it is genuinely achievable for a fit multi-day hiker, unlike some of the West’s bigger, longer classics.
Why This Trail
Most multi-day trails in the Rockies make you earn one big view at the end. The Teton Crest Trail gives you a new one most mornings: Death Canyon Shelf’s open bench under the west faces of the Tetons, the glacial cirque above Alaska Basin, Hurricane Pass looking straight across at the Grand Teton’s west side, Lake Solitude below Paintbrush Divide. Experienced backpackers who compare it to longer trips like the John Muir Trail or the Wonderland Trail tend to rate it as the best scenery-to-effort ratio of the three: you get five days of consistently dramatic terrain without needing two weeks off work or a decade of backcountry experience.
The trail is also unusually flexible. Because it can be accessed from several trailheads and a scenic aerial tram, hikers can shorten it, lengthen it with side trips to Static Peak or the Wall, or turn it into a long weekend rather than a full week. That range of options, combined with genuinely spectacular terrain, is why it shows up on almost every list of America’s best backpacking trips, and why competition for a summer permit is fierce.
Trail at a Glance
| Spec | Detail |
|---|---|
| Distance | Approximately 40 miles (64 km) end to end, from Phillips Bench Trailhead to Leigh Lake Trailhead. Starting instead at the Jackson Hole Aerial Tram cuts about 5 miles and 2,500 to 3,000 ft of climbing off the southern end, for a trip closer to 35 miles. |
| Duration | Most backpackers take 4 to 6 days. Very fit hikers with light packs can do it in 3; those adding side trips to Static Peak or Alaska Basin’s lakes often take a full week. |
| Difficulty | Moderate to hard. Two significant passes (Hurricane Pass and Paintbrush Divide, both above 10,000 ft) and roughly 8,000 to 9,000 ft of cumulative elevation gain, depending on direction and trailhead, put this above a first backpacking trip but well within reach of an experienced multi-day hiker. |
| Best season | Mid-July through late September is the reliable window. The permitted season runs May 1 to October 31, but snow can linger on Hurricane Pass and Paintbrush Divide into late July or even August in a heavy year. |
| Permits | Required for every backcountry night inside Grand Teton National Park. One-third of camping-zone reservations open on Recreation.gov on the first Wednesday of January; the remaining two-thirds are issued as walk-up permits no more than a day ahead. (Alaska Basin and Fox Creek Pass sit in the Jedediah Smith Wilderness, outside the park, and need no permit, though you still log them on your GTNP itinerary if camping in the park on other nights.) |
| Start trailhead | Phillips Bench Trailhead, Teton Pass Highway (WY-22): Phillips Bench Trailhead on Google Maps |
| End trailhead | Leigh Lake Trailhead, near String Lake, Grand Teton National Park: Leigh Lake Trailhead on Google Maps |
| Popular shortcut start/end | Jackson Hole Aerial Tram, Teton Village: Jackson Hole Aerial Tram on Google Maps |
This is a point-to-point trail, not a loop, so you need a plan for getting back to your car (or hiking partner) at the other end. See Getting There and Away below.
Trail Map
View the Teton Crest Trail on AllTrails: includes an elevation profile, current condition reports from recent hikers, and photos from most of the camping zones.
Grand Teton National Park backcountry camping zone map (NPS) (PDF, opens in browser): the official reference for every camping zone boundary and quota along the route.
Getting There and Away
Getting there: Jackson Hole Airport (JAC) is the nearest commercial airport and sits inside Grand Teton National Park itself, the only commercial airport located within a US national park. It’s about a 20-minute drive from the town of Jackson and roughly the same from Teton Village. If you’re driving instead, Salt Lake City is about 300 miles away (5 to 6 hours), and Denver is around 550 miles (8 to 10 hours). There is no public transit to either the Phillips Bench or Leigh Lake trailheads; the only local transit is the START bus running between Jackson and Teton Village, which is useful only if you’re using the Aerial Tram as your southern access point.
Because the standard route is point-to-point, you’ll need to arrange your own transport between the two ends: a two-vehicle shuttle (leave one car at each trailhead), a private shuttle service, or hitchhiking, which is a genuinely common and accepted practice on this route among hikers without a second car. Verify current local shuttle operators and rates before finalising transport, since small operators serving this specific route change from season to season.
Getting away: If you finish at Leigh Lake Trailhead, you’re at String Lake in the heart of the park, close to Jenny Lake, Moose, and the park’s own lodges and campgrounds for a post-trail night. If you finish at Phillips Bench, you’re on Highway 22 (Teton Pass Highway) with parking available at pullouts near the trailhead; from there it’s a short drive back down into Jackson.
Staging towns: Jackson is the default base, with the widest range of accommodation, gear shops, and food resupply. Teton Village, at the base of the Aerial Tram, is a smaller, more convenient option if you’re using the tram to start or end. Both entrances require a park pass: $35 per vehicle, $30 per motorcycle, or $20 for a hiker or cyclist, valid for 7 days, or an America the Beautiful annual pass.
Day-by-Day Breakdown
The itinerary below is a common 5-day pace, walked south to north from Phillips Bench to Leigh Lake. This direction has a modest edge over the reverse: hiking north to south nets around 1,000 ft more climbing than descending overall, so most guides default to south-to-north for a slightly gentler cumulative grade. Camping zones are reserved by zone, not by specific site, so treat the distances below as approximate; where you actually pitch your tent within each zone shifts the daily mileage a little.
Day 1: Phillips Bench Trailhead to Granite Canyon, South/Middle Fork (about 9.2 miles)
Highlight: The trail’s quietest, least-crowded miles.
The trail climbs out of the highway corridor and into the Jedediah Smith Wilderness before crossing into Grand Teton National Park via Moose Basin. This stretch is the least-maintained section of the whole route and sees noticeably fewer hikers than the park’s interior. Water is scarcer here than anywhere else on the trail: there is typically only one reliable creek, roughly halfway along, plus a few seasonal streams. Carry extra water leaving the trailhead. The day ends past Marion Lake in the Granite Canyon South/Middle Fork camping zone, a broad, forested basin with a 24-person quota, the largest on the trail.
Day 2: Granite Canyon to Death Canyon Shelf (about 6.1 miles)
Highlight: Death Canyon Shelf’s open bench under the Teton peaks.
A shorter day that climbs through Fox Creek Pass, briefly crossing back into the Jedediah Smith Wilderness for about 1.5 miles before re-entering the park. Death Canyon Shelf is one of the trail’s signature camps: a long, open bench under the western faces of the Teton massif, with seasonal streams and sweeping views down into Death Canyon itself. It’s exposed to weather, so expect wind even on an otherwise calm day. This is also where hikers doing a shorter itinerary sometimes exit via Death Canyon to a separate trailhead rather than continuing north.
Day 3: Death Canyon Shelf to South Fork Cascade Canyon (about 9.6 miles)
Highlight: Hurricane Pass and Schoolroom Glacier, the trail’s best single view.
The longest and most demanding day on this itinerary, climbing over Mount Meek Pass and through Alaska Basin, a glacially carved basin technically outside the national park in the Jedediah Smith Wilderness, dotted with lakes (Sunset Lake among them) and framed by jagged peaks. From Alaska Basin the trail climbs to Hurricane Pass at 10,338 ft, the second-highest point on the route and one of its best views: the Grand Teton’s rugged west face rises directly across the valley, with Schoolroom Glacier visible just below the pass. The trail then drops into the South Fork of Cascade Canyon to camp, an 18-person-quota zone.
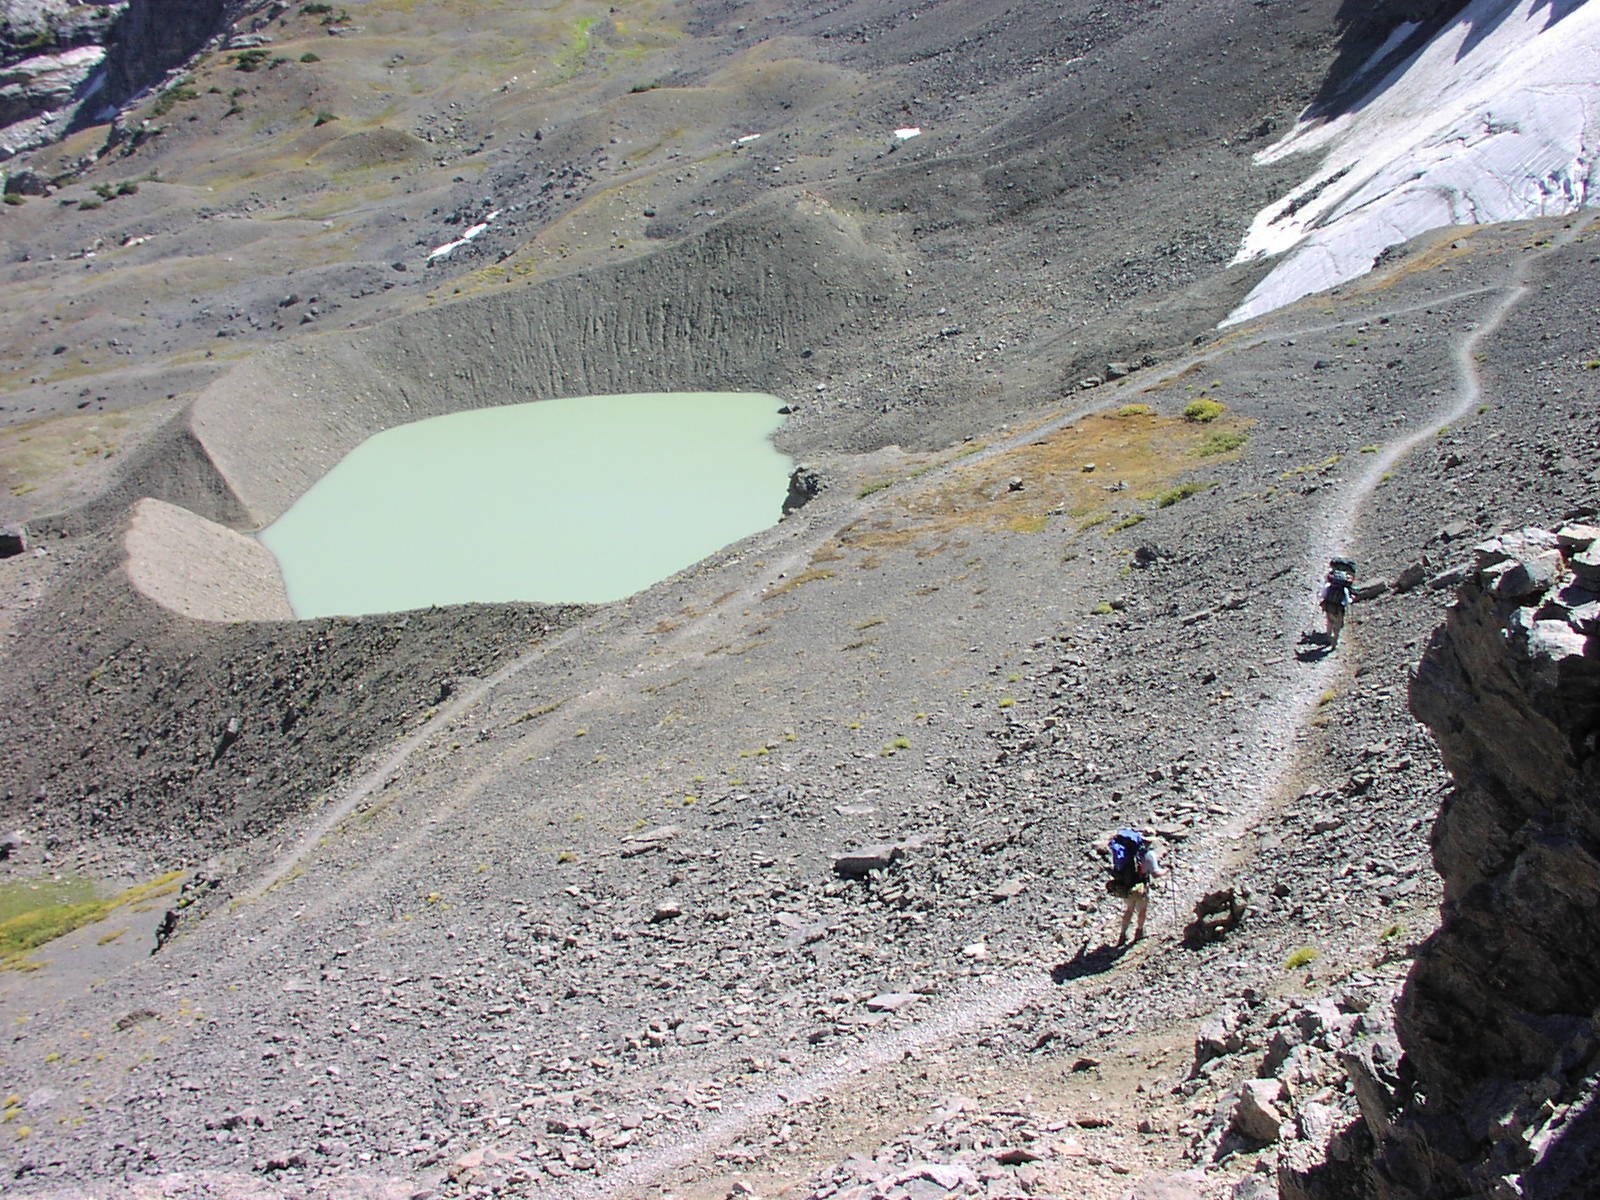
Day 4: South Fork Cascade Canyon to Upper Paintbrush (about 8.4 miles)
Highlight: Lake Solitude and Paintbrush Divide, the trail’s highest point.
Continues down and across through the North Fork of Cascade Canyon, passing Lake Solitude, a glacial tarn that’s one of the most photographed spots on the trail, before the day’s real test: the climb to Paintbrush Divide at roughly 10,700 ft, the highest point on the Teton Crest Trail. Snow can linger here into late July, and in a heavy year microspikes or an ice axe may be genuinely necessary; check current conditions with the park before you commit to this crossing. The exposure at the top is real, with loose rock and fast-changing weather. Camp in the Upper Paintbrush zone on the far side.
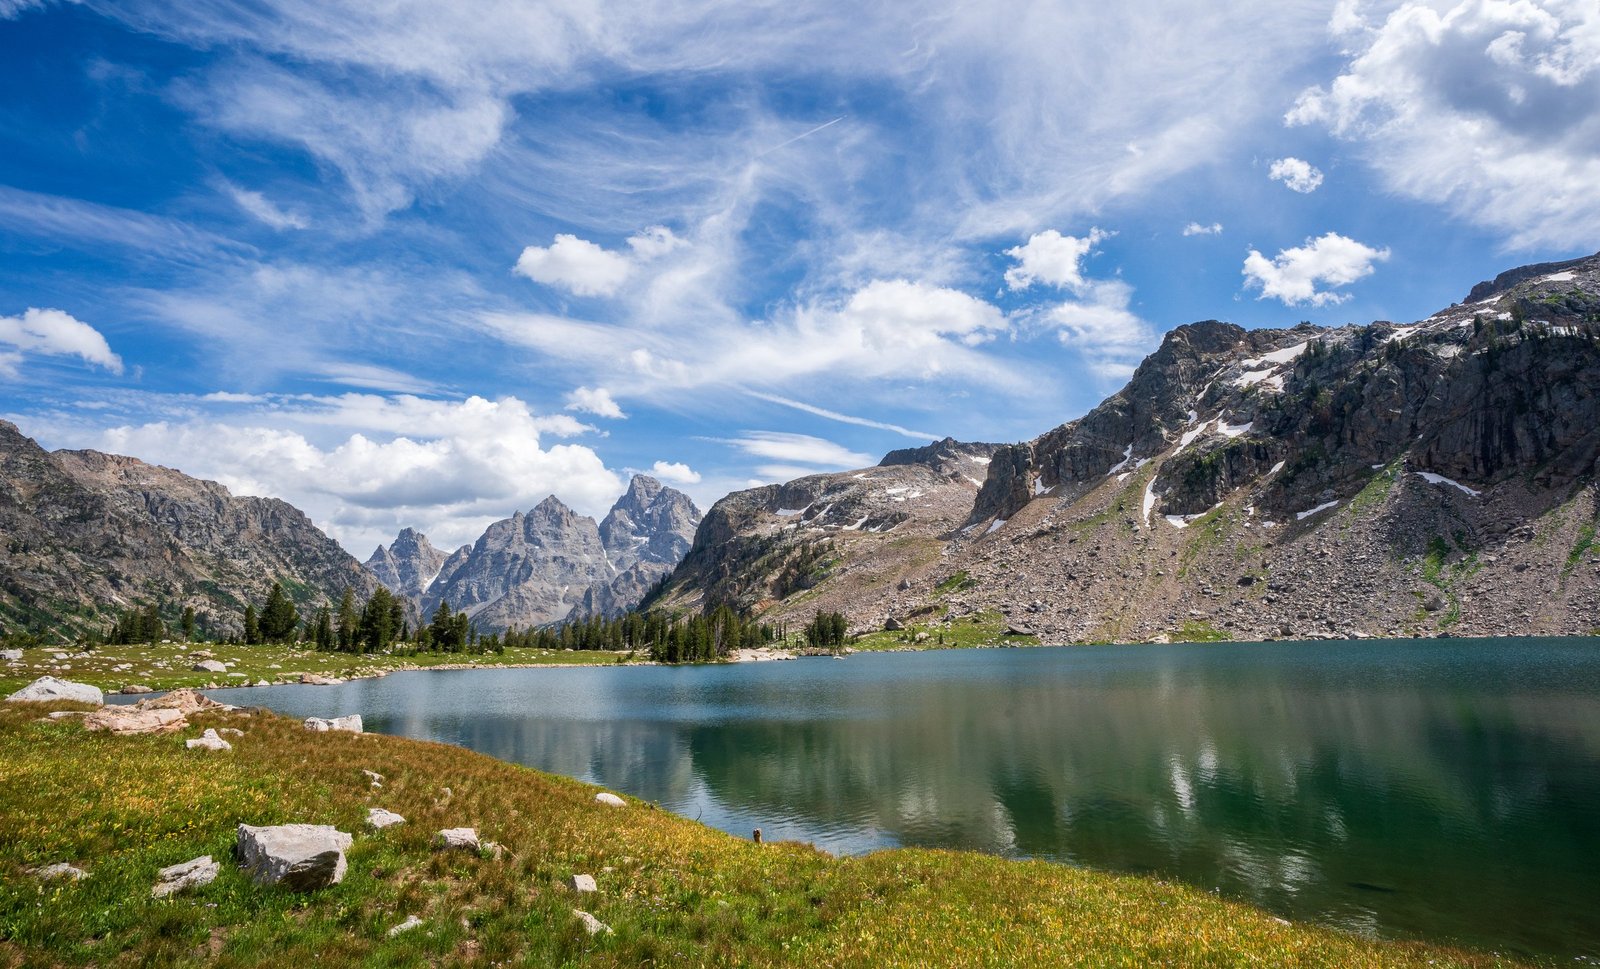
Day 5: Upper Paintbrush to Leigh Lake Trailhead (about 9.2 miles)
Highlight: Holly Lake on the final descent to String Lake.
A long, steady descent through Paintbrush Canyon, passing Holly Lake partway down, and finishing at String Lake near the Leigh Lake Trailhead. It’s a big final day after four days of accumulated fatigue and over 8,000 ft of cumulative climbing behind you; hikers who prefer to split it sometimes camp at Holly Lake or the Lower Paintbrush zone instead of pushing straight through.
What to Expect
Terrain: Alpine and subalpine most of the way, with two significant passes above 10,000 ft, open meadow benches like Death Canyon Shelf, and glacially carved basins like Alaska Basin. Expect loose rock and real exposure at both Hurricane Pass and Paintbrush Divide.
Weather: Summer days often reach the 70s and low 80s°F, with nights dropping into the 30s°F even in August, and freezing temperatures possible at any time of year at elevation. Thunderstorms build quickly in the Tetons; plan to be off exposed passes by early afternoon where possible.
Wildlife: Grand Teton has a healthy population of both grizzly and black bears, along with moose, elk, bighorn sheep, and occasionally mountain lions and wolves. Bear spray is effectively mandatory, not optional, and a bear canister or approved bear-resistant sack is required for food storage in the park’s backcountry (available as a free loan at permit-issuing stations if you don’t own one).
Crowds: July and August are the busiest months and the hardest to get a permit for. September offers noticeably fewer people, cooler days, and a real chance of an early snap of fall weather.
Signature features: Death Canyon Shelf, Alaska Basin and Hurricane Pass, Schoolroom Glacier, Lake Solitude, and Paintbrush Divide are the points most hikers remember and photograph.
Water: sources, safety, and treatment
Water is generally abundant and you’ll rarely go more than about 4 miles or two hours between sources, with the exception of the southernmost stretch between Phillips Bench Trailhead and the park boundary, where there is typically only one reliable creek along roughly 10 miles. Treat every water source on this trail; nothing here should be considered safe to drink untreated given the volume of both wildlife and hikers using the same basins. By late August and into September, many smaller streams dry up and the remaining sources can carry more sediment, so carrying a pre-filter, even something as simple as a bandana, to strain debris before running water through your main water filter will save you time and frustration. Lakes are a reliable fallback throughout the season.
What Hikers Say About the Teton Crest Trail
This section pulls together what people who have hiked the Teton Crest Trail wrote down afterwards, so the planning above is checked against real trips. The reports run from 2015 to 2022, so treat them as the trail’s character, not today’s rules or conditions. Check Grand Teton National Park’s current permit and trail information before you go.
Scenery gets the praise, and the trail gets few complaints. A 2018 hiker called the scenery non-stop. A 2015 hiker singled out Alaska Basin and Hurricane Pass and said the trip gave him a deep sense of peace. A 2021 hiker praised the Hurricane Pass camp views. A 2016 trio named Marion Lake, Death Canyon Shelf and Lake Solitude as highlights and saw few other backpackers late in the season.
Permits are where the stress is. A 2018 hiker found a queue already forming an hour before the visitor centre opened. A 2016 group arrived around 6:45am for a walk-on permit and had only one party ahead. A 2019 forum thread shows how easily plans go wrong: one hiker booked Death Canyon instead of Death Canyon Shelf because the names are close and ended up with a day of about 22 to 23 miles. Other hikers advised adjusting reservations at the ranger station when you collect your permit, since cancellations and walk-in holds often open up. Double-check the zone name before you pay.
Weather: expect all of it. A late August 2018 hiker found fresh snow at the top, plenty of wind and loads of mud, though little rain. A 2015 trip had rain, hail and a thunderstorm in Cascade Canyon at temperatures around the mid-50s Fahrenheit. A 2021 trip had two rainstorms in Alaska Basin and heavy wildfire haze for several days, though the hiker called the temperatures near perfect. A 2016 group had smoke from a nearby fire close trails elsewhere in the park, which pushed them onto this route.
Paintbrush Divide is the day people remember. A 2015 hiker called it very manageable but windy and said he would not want to cross in a storm; the back side had only a small snowfield that needed no ice axe. A 2021 hiker called the backside the sketchiest part, with loose rock and a small snowfield on a steep slope. A 2016 group rated the trip moderate to hard and found the steep scree descent into Paintbrush Canyon unexpectedly challenging. Climbs to Hurricane Pass and the divide were strenuous.
Wildlife is close. The 2016 group had deer in camp, a moose within about 100 feet of the tents and a black bear around 75 feet away on the Paintbrush Canyon trail. A 2015 hiker heard growls near Paintbrush that might have been a bear, kept spray ready and never saw an animal.
Camps vary a lot. A 2019 hiker reported poor and buggy tent sites in Alaska Basin and windy sites at Holly Lake, with the lower sites more sheltered. A 2015 hiker camped on a cliff edge at Death Canyon Shelf and worried about wind that did not materialise. There is also forest camping near Hurricane Pass with room for a few tents. A 2021 hiker found the junction at Cascade Canyon crowded.
Water is easy. A 2015 hiker said water was available along the whole route, carried only one litre and found a UV purifier worked well.
Logistics. A 2015 trio paid $37 each for the tram and found Teton Village parking free in a fenced lot. A 2018 hiker left a rental car at the end and took a taxi shuttle to Teton Village. Bear canisters were loaned at the permit station in 2015 and 2016.
What Hikers Say They Packed, Used and Wished They Had
- Waterproof gloves. A 2015 hiker called cold, wet hands in the morning miserable. See best gloves for hiking.
- A canister big enough for the group, and a pot to match. The same hiker’s small canister forced repacking into other canisters, and his 16 oz pot was too small for group meals. See best bear canisters for multi-day hiking.
- A pack that can take the load. His 50 litre pack’s seams ripped under a heavy load. See best multi-day backpacks.
- Rain gear that is actually treated and ready. The same hiker praised re-proofed rain jacket and pants after rain, hail and thunder. See best waterproof jackets.
- Warm sleep gear. One hiker said his down bag was warmer than expected, which mattered with fresh snow reported at the top in late August. See best down sleeping bags.
- Trekking poles. For the steep climbs, long descents and the Paintbrush scree. See best trekking poles.
- Bug protection for Alaska Basin. Reported buggy in 2019. See best bug nets for camping.
Sources (paraphrased, no text copied): Peter Treiber on Backpacking Light, August 2018; Richard Jirik, Wasatch Mountain Club, 2016; Mikjik86 on Backcountry Post, July 2021; pstm13 on Backcountry Post, July 2015; Backcountry Post permit thread, 2019.
Logistics
Permit reservations open on Recreation.gov at 8 a.m. Mountain Time on the first Wednesday of January (January 7 in 2026) for that summer’s season, and effectively sell out within minutes for the most popular camping zones. The advance-reservation fee is a $20 non-refundable application charge plus $7 per person per night.
If you miss the advance window, roughly two-thirds of each night’s camping-zone capacity is held back for walk-up permits, issued in person no more than one day before your trip starts, typically at the Craig Thomas Discovery & Visitor Center in Moose. Arrive at least two hours before opening in peak season if you want a real shot at your preferred zones.
Your permit is for a camping zone, not a specific site: you choose any open, previously used site within your assigned zone on a first-come basis. Groups of 7 to 12 people must use designated group sites. The main camping zones, north to south, are Paintbrush Lower, Outlier Site, Holly Lake, Paintbrush Upper, North Fork Cascade, South Fork Cascade, Alaska Basin (no quota, no permit), Death Canyon Shelf, Fox Creek Pass (no quota, no permit), Marion Lake, and Granite Canyon South/Middle Fork.
Mandatory Gear Checklist
- A bear canister or approved bear-resistant food sack, required for every backcountry night in the park. Free loans are available at permit-issuing stations if you don’t own one. See best bear canisters for multi-day hiking.
- Bear spray, one canister per person, easily accessible rather than buried in your pack. Grizzly country, not optional.
- Trekking poles, given the sustained climbing and descending over Hurricane Pass and Paintbrush Divide. See best trekking poles.
- A genuinely waterproof rain shell, since afternoon thunderstorms build fast at this elevation. See best waterproof jackets.
- An insulated jacket for camp, given overnight temperatures near freezing even in August at the higher camps. See best insulated jackets for hiking.
- A water filter you’re prepared to pair with a pre-filter late in the season, when the smaller streams run low and silty. See best water filters for hiking.
- Microspikes, worth packing if you’re hiking before late July, when Hurricane Pass and Paintbrush Divide can still hold snow and ice.
For the complete category-by-category kit, including sleep system, footwear, and cooking gear (campfires are banned trail-wide), see What to Pack for the Teton Crest Trail.
Honest Assessment
This trail suits an experienced multi-day hiker who is comfortable with sustained climbs above 10,000 ft, real exposure on two high passes, and the logistics of a point-to-point route that needs a shuttle plan. It is not an ideal first backpacking trip, mainly because of the altitude and the two big passes, but it is genuinely more approachable than longer Western classics: the mileage is modest, the terrain is well-marked and heavily used, and the permit system, while competitive, is straightforward once you understand it.
It’s not the right choice if you can’t commit to the January permit scramble or a flexible walk-up plan, if high alpine exposure makes you nervous, or if you’re not prepared to arrange your own transport between two trailheads. For a shorter taste of the same terrain, the Aerial Tram start cuts real mileage and elevation without sacrificing much of the scenery, and a 3-night version hitting Death Canyon Shelf, South Fork Cascade, and Holly Lake is a popular way to see the trail’s best sections in less time.
Among hikers who’ve done the West’s major multi-day trails, the consensus on the Teton Crest Trail is that it delivers a disproportionate amount of classic alpine scenery for a relatively modest time and fitness commitment, which is exactly why the permits go so fast.
Final Thoughts
The Teton Crest Trail rewards a hiker who plans the permit process as carefully as the itinerary. Start with how to plan your first multi-day hike if you’re still dialling in your fitness and logistics, and if you’re weighing this against another big Western trip, our Wonderland Trail guide is a useful comparison: similarly dramatic, but a longer, harder commitment. For a shorter, similarly compact loop, our Four Pass Loop guide covers Colorado’s version of the same high-payoff, few-days-off trip.
Frequently Asked Questions
How hard is it to get a Teton Crest Trail permit?
Competitive. Only a third of camping-zone capacity is released in advance, in a window that opens the first Wednesday of January and can sell out within minutes for popular zones. The remaining two-thirds go to walk-up hikers who apply in person no more than a day before their trip starts.
How many days do I need for the Teton Crest Trail?
Most backpackers take 4 to 6 days for the full 40-mile route. Starting from the Aerial Tram instead of Phillips Bench shortens the trip by about 5 miles and a full day’s worth of climbing, and very fit hikers can do the whole thing in 3 days.
Do I need a bear canister on the Teton Crest Trail?
Yes. An approved bear canister or bear-resistant sack is required for every backcountry night in Grand Teton National Park. If you don’t own one, the park loans them out free at permit-issuing stations.
What is the biggest mistake first-time Teton Crest Trail hikers make?
Underestimating the altitude and the two big passes. The total mileage looks modest next to trails like the John Muir Trail, but climbing to over 10,000 ft twice, on Hurricane Pass and Paintbrush Divide, is a different kind of demanding than covering flat mileage at lower elevation, especially for hikers arriving from sea level.
